Mobile Voice Over Studio
Working as a voice actor can be pretty fantastic. With a home studio and consistent work, you can make a decent living while maintaining relatively flexible hours. It sounds pretty simple, but the one thing you must do as a voice actor – when opportunity knocks, you have to answer.
Because of this, having a way to record when you’re away from that home studio is pretty important.
Imagine it’s day one of a five-day vacation with your family. Your plane lands, and you see an email request for an audition. It happens to be the opportunity of a lifetime, for which you are a strong candidate. But, your audition is required by the end of the day. Then, you realize that you have no way to record a viable, professional audition. If you can’t deliver a solid piece of audio, you probably won’t land the job. And knowing that, you may spend your vacation feeling a bit of regret.
After the second time that happened to me, I decided to create a mobile recording solution.
So what is it that a voice actor really needs in their mobile studio?
- Something to record your voice with. Like a microphone.
- Something to record your voice into. Like a laptop.
- Some way to edit and deliver that audio. Like, the same laptop.
There are many ways you can go with this info.
Keeping it Simple
If you’re just looking for an inexpensive way to record and deliver your voice into the right hands, there are a few options. You can use the simple voice recorder on your phone (I have), or a USB mic plugged into a tablet or laptop (I have). Or even a digital recorder with USB connectivity for extracting the file (I have). They all get the job done, with varying degrees of quality. Provided you can transfer the audio files into editing software (which you have on your laptop), then you can even edit or adjust levels/EQ/compression before sending your audition. If your agent or client is aware that you’re out of your studio – but you’re aware enough to have recording equipment with you at all times – they’ll probably understand (and have a favorable opinion of you). But even so, the quality may be notably lower than your home studio. The big win here is portability and simplicity. If you can find something so small that it fits in your carry-on – AND it sounds good – then you’ve got what you need.
A Portable Studio
That said, if you’re looking for a solution which provides more quality at the expense of another suitcase, allow me to make some suggestions. They’re not the only options available, nor are they the best pieces of equipment on the market. I think you’ll find them viable options for a high quality sound, without costing a small fortune. These suggestions may also wind up working perfectly in your home studio (so consider them for all around use).
The Equipment
In a setting like a hotel room, you’ll want to reduce the likelihood of external noise ending up in your recording. You can do this with a mic which has a high signal-to-noise ratio (not the best indicator of quality, but it’s often a good metric). You should also use high quality cables and other equipment, so that you reduce the potential for signal anomalies. I typically pack my Sennheiser MK4, but have used my SE s2200E II, or my Electro Voice RE 20 (which benefits from a clean gain boost, like the Cloud Lifter).
Your USB interface should not rob you of quality. Some compact solutions can even add something beneficial to your mix. I’ve used the Focusrite Scarlett Solo, and the Focusrite Scarlett 6i6. While I like the flexibility of the 6i6 more than the Solo, my first 6i6 suffered a headphone channel failure within a month of the one-year warranty expiring. I was able to have it fixed, but had to ship it back to Focusrite to do so. Even so, I’m not sworn off of them just yet.
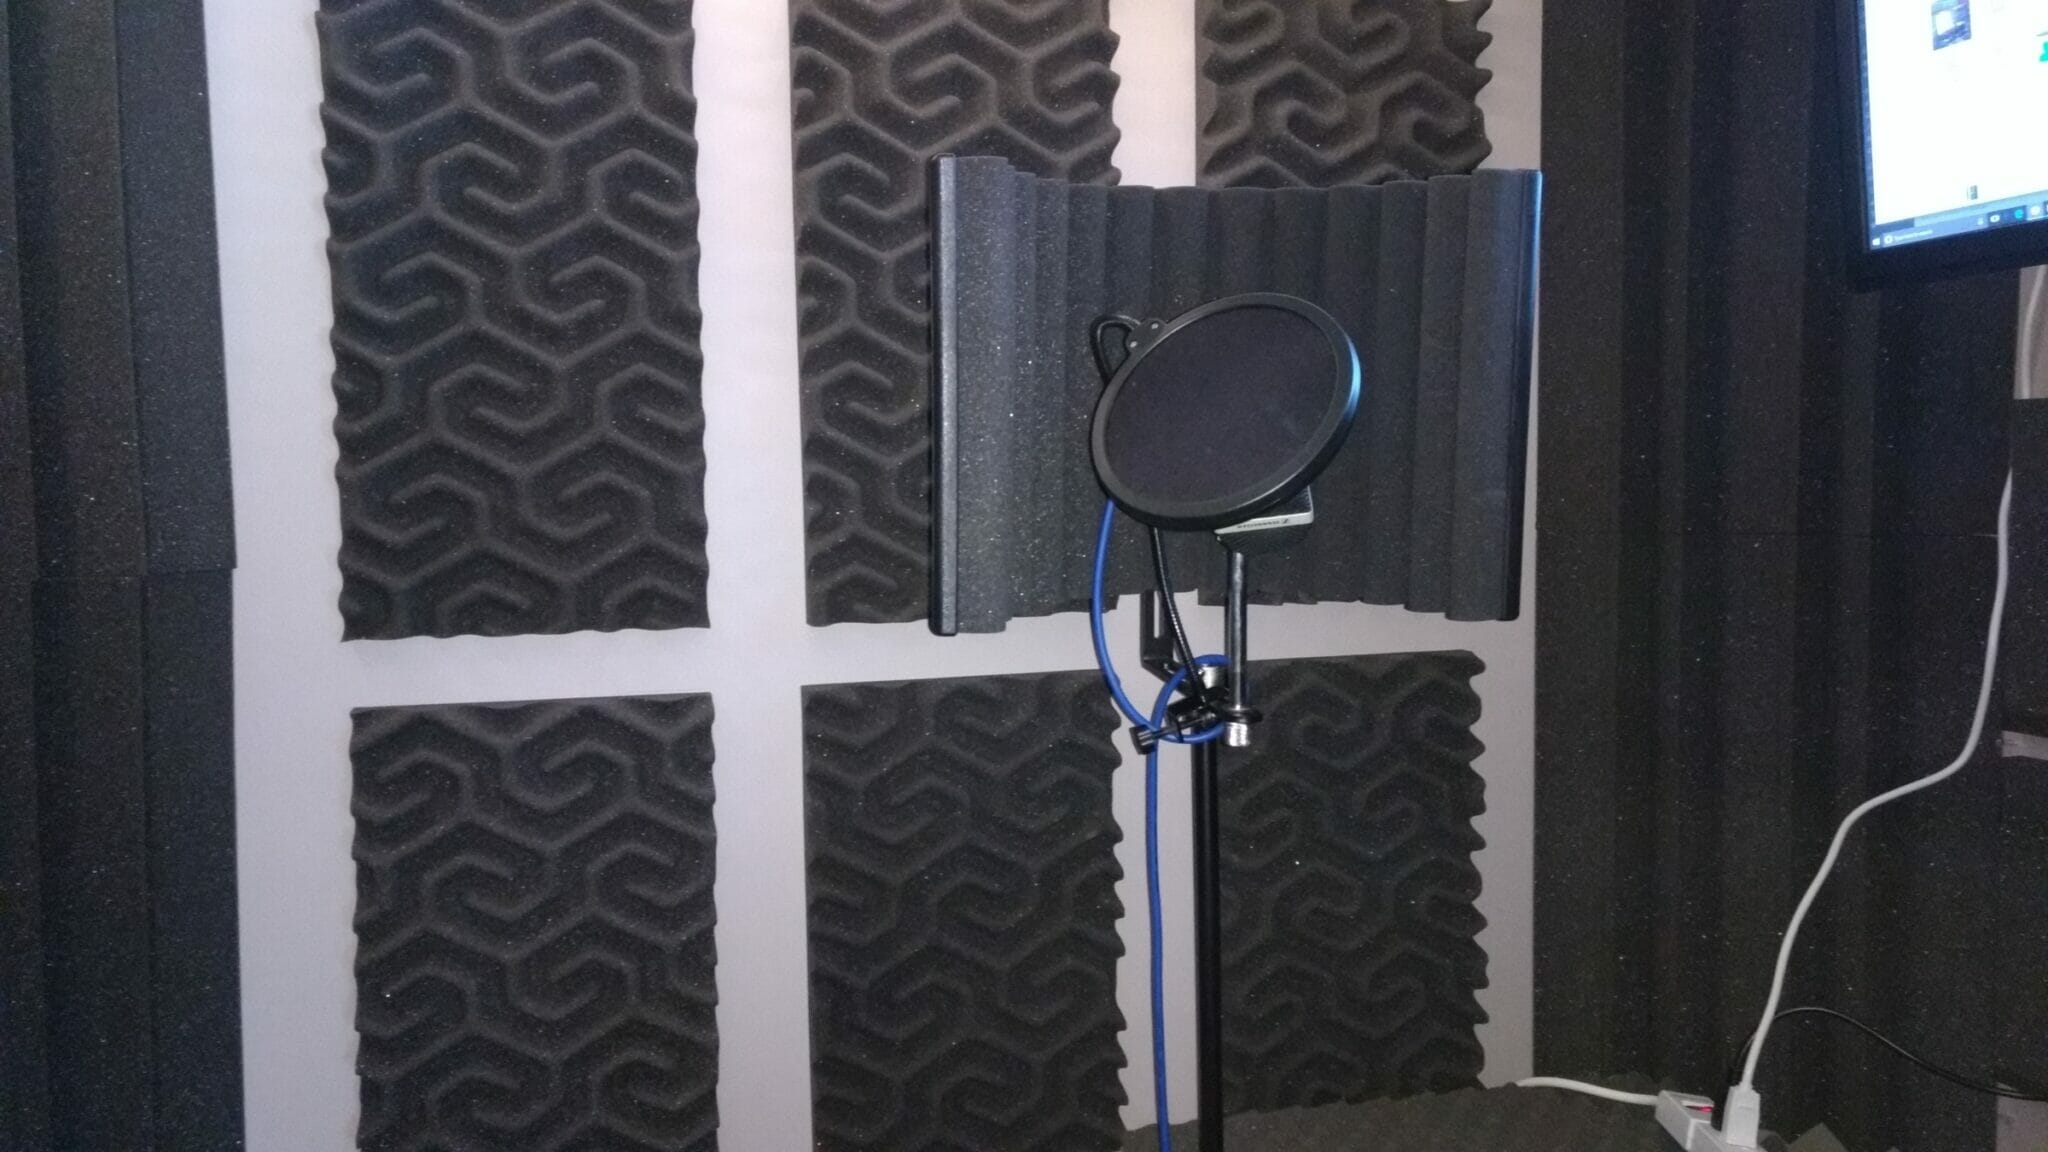
Sound suppression will help dampen acoustic bounce (which can be a problem in a hotel room), but there are a lot of options available to help. Some are like foam boxes (in which the mic sits), but a bit of online research showed that the better science is with a parabolic shield and multiple layers of acoustic protection. These shields sit behind your mic, typically attached to the mic stand (or a secondary microphone stand). I went with the sE Electronics Reflexion Filter X. The positive notes are that it’s lightweight, and will fit into a larger wheeled carry on bag. It also effectively deadens the reflections of a sub-standard recording environment. But on the down-side it’s rigid, and cumbersome – so traveling with this piece of equipment is something I’ll consider on a case-by-case basis. In all honesty, I’ve used blankets and pillows, tucked in and around a dresser drawer (or any space in a hotel room on which you can “build” a booth) in a pinch. Did it work? Yes. Was it perfect? No.
You’ll kick yourself right in the ass if you forget headphones, but most big box electronic stores can supply them if you’re in a bind. I found a great deal on a pair of Sennheiser HD 588 headphones – but I also like my Audio Technica ATH-M50x headphones, which I use in-studio . Experience has taught me that you always want to have a back-up pair (or two). And don’t forget to have plenty of connectors and adapters in your mobile studio kit.
Cables are essential, but depending on the cables you need, you may have a really tough time locating replacements on short notice. I’ve used these six foot GLS Audio patch cables in my home studio as well as my road kit – and haven’t had any issues. There are also three foot cables for shorter distances. The color coding helps me see right where everything is coming and going in the audio chain. I keep plenty of them on-hand.
Another element of the mobile studio is some manner of mic stand. I’ve used compact, clamping boom arms (which I didn’t care for) – as well as the heavier table-top mic stands (which I liked). Ultimately, they’ll take up space and add weight to your kit (especially the weighted base). You can also hold the mic if you’re still and quiet about it, or create a makeshift mic stand by standing the mic upright in a hotel room glass (depending on the alignment of your mic, of course).
The last thing you want is to lug your mobile studio half-way across the country, only to find that it’s been damaged in transit. Not only can you not record anything until you get home, but you have to schlep that busted gear back home. Upon finding a variety of boxes online, I was tempted to buy one of the less expensive cases, but I realized this case could be the difference in landing a huge project. So, I sprung for the Pelican 1510 case. This particular case is large enough to carry virtually everything (except the laptop), and comes with customizable foam padding. Considering it’s still only 20% of the cost of the entire kit, it was well within reason.
I use a standard PC laptop, but I’ll let you sort that piece out yourself.
Again, I don’t expect this batch of equipment to be the end-all, be-all of mobile recording – but it has worked well for me. At the very least, there are some good suggestions for mid-priced equipment for home studio or mobile use. Everyone’s situation is different, and you may not be comfortable spending so much. Likewise, you may be perfectly fine opting for a USB mic and a laptop. It all depends on your volume of auditions and your style of work.
~Jason
Published on Apr 12 2016
Categories: News
Tags: mobile recording, portable recording studio, voice over studio