New Studio – Part Two: Changing Plans
I get very excited about possibilities. I love imagining and dreaming big, conceptualizing projects, and brainstorming. I’ve spent the last 16 years studying, performing, and occasionally teaching improvisation, so I’m really comfortable diving into something and sorting problems as they arise.
But while those personality traits have been great for much of what I do, they’re not ideal when it comes to managing the build of a voice over studio.
I’m especially grateful for all the people who had a hand in the build, two in particular. My wife and business partner, Chris, for being a fantastic project manager. And my builder, Andy Kidd, who took the build on as a second job, taking time away from his family and spending many late nights and weekend hours putting it all together. It could not have happened without Chris and Andy.
The Plan
In late 2016, my wife and I started looking at houses. To maintain and grow my voice over business, we needed to leave Madison for a more quiet setting. Our new home would ideally be far from the noise of the commercial flight path, and afford us the space to build the studio away from the main living areas of the house (and the joyful ruckus of our two kiddos). After looking at half a dozen homes, we finally found the perfect fit in early 2017. We would close on the house on May 31st, and we planned to have the studio completed by June 16th.

This storage space in the garage would become something more productive. These photos were taken when the previous owners were still staging things to move out.

The space was a 15′ x 16′ area in the garage, with a 9 foot ceiling. The plan was to construct a box within that space, which would become the studio. A smaller box would be built within the studio, which would be the recording booth. The studio walls/ceiling wouldn’t make contact with the walls or ceiling of the garage space – and the floor would “float” on rubber isolation pads. Ideally, the studio would offer enough sound suppression on its own that external sound wouldn’t make it in to the studio, let alone the booth. This allows for a lot more flexibility in the soundscape of a voice over.
The Reality
This space needed more than just clearing out. The homemade shelving would have to go, electrical/light fixtures would need to be dealt with, and then there were the windows. In terms of soundproofing, windows are essentially holes in the wall through which sound can leak in. Even well-installed, top quality exterior windows are still woefully inadequate at keeping exterior noise out. These windows were original to the home’s construction, poorly installed, and in rough condition. Just replacing those two windows wouldn’t be enough. I would also need to install soundproof windows in the studio to really eliminate external sound.
It wasn’t that simple though. The soundproof windows would each consist of two panes of 5/8th inch thick glass. Each pane of glass would weigh nearly 200 pounds. The company is based in Nevada, and each shipment is carefully crated by hand. Shipping was a considerable portion of the window’s cost. Due to the size and weight, installing the windows would require special equipment (and a lot of muscle) to lift into place. Because of all of this, the price tag of two new exterior windows and two 50″ x 50″ soundproof windows would eat up over 30% of the total build budget.
At this point, we had a month and a half before closing. Just enough time to order the Soundproof Windows, if we wanted the studio completed on June 16th.
ACTION!
We opted to remove and seal one exterior window entirely, and reduce the size of the other. A standard size, mid-quality replacement window was our best option. The single Soundproof Window, now substantially smaller than 50″ x 50″, would be more manageable in terms of both cost and installation. Repairing/replacing the siding was another added cost, but it needed to be done. The window order was placed, and we waited for closing.
My wife is a master of spreadsheets and planning. A CPA by profession, she took my measurements and notes and made sense of it all.
A few days later, we were the proud owners of:
Nearly twenty 4’x8′ sheets of plywood.
About 90 two by fours.
Almost 70 sheets of drywall.
Two insulated steel entry doors.
1000 square feet of insulation
Four cases of Green Glue (acoustic adhesive/sealant)
240 square feet of flooring
150 isolation clips / 2 dozen furring channels
A gazillion drywall screws
Carpet
Vinyl plank flooring
1 Senville mini-split ductless AC/heating unit
And a few days after closing, our garage (and a part of our driveway) was home to stacks of construction materials.
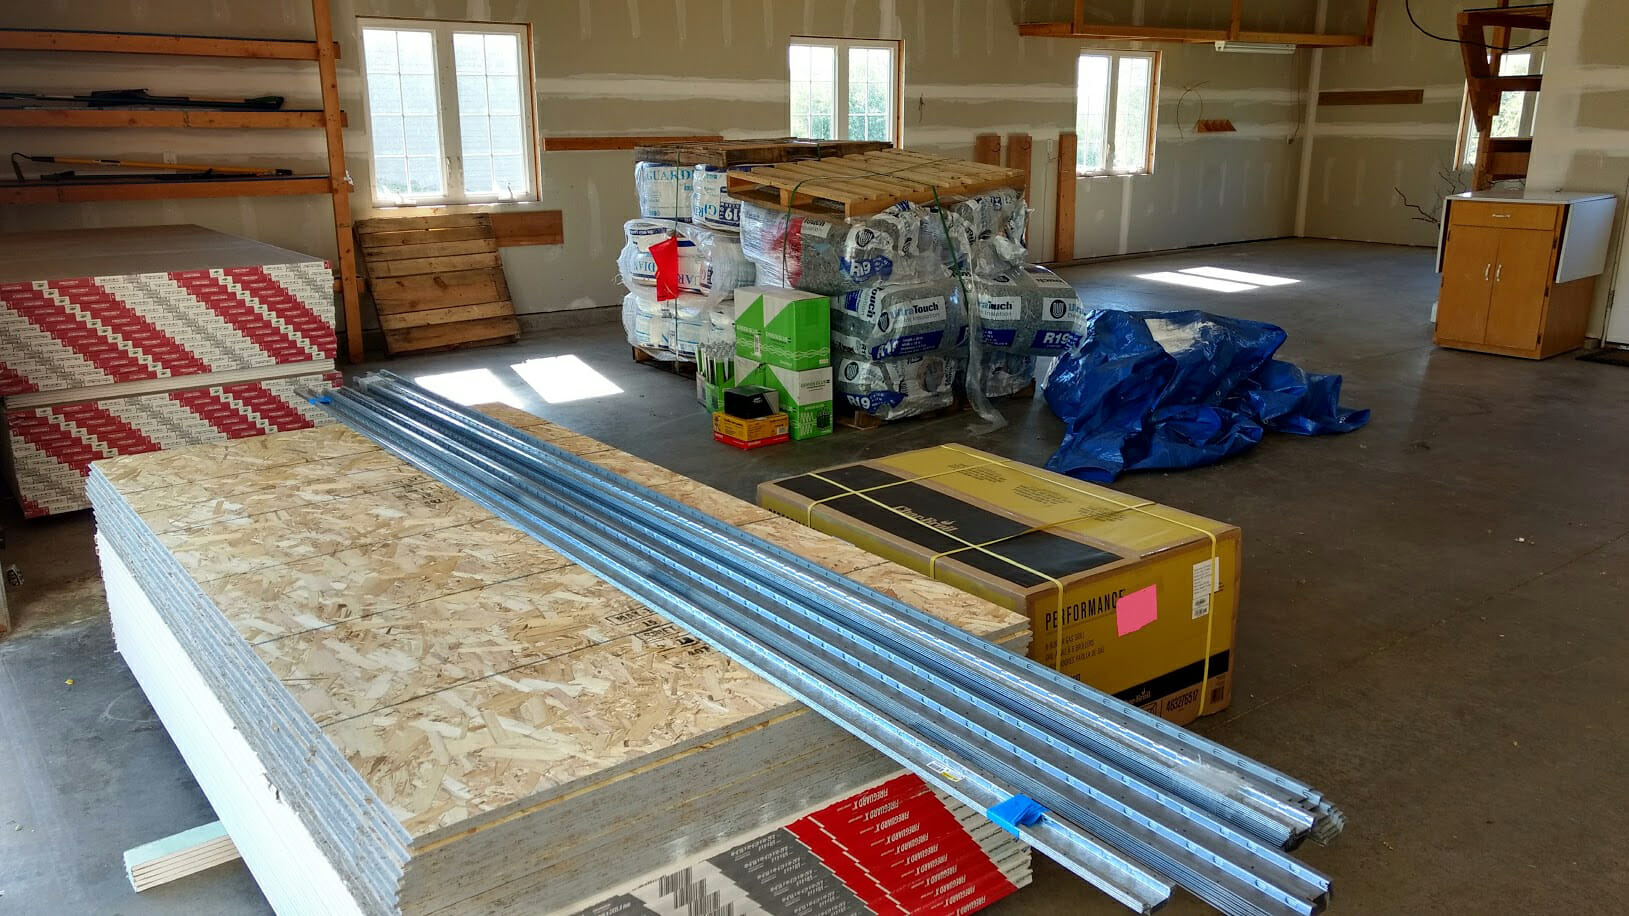
Drywall, plywood/OSB, hat channels (for isolation clip/drywall installation), insulation, etc…

Lumber stack!
The Team
Andy isn’t just a construction expert, he’s also pretty damn resourceful. He could see where there might be issues with the build, and he came up with some great ideas to solve them. Finding an available electrician was tricky, but Andy came through on that too. A drywall finisher came by way of a high school classmate who agreed to take on the job after hours. A painter and a local flooring contractor rounded out the team. The building inspector gave us the green light and away we went. With all these pieces falling into place, it looked like this might actually get done in a couple of weeks after all!
Hold on…
Almost everyone involved was taking on this project outside of their full-time jobs, in the middle of a busy summer. Vacation plans, Father’s Day, special events, and being a man-down when one of the guys involved wound up in the hospital – and suddenly the studio build was on pace for completion by July 1st instead of June 16th. So, I did what I do. I improvised.
Blanket Fort
We had rented back our previous home (and studio within) until July 16th. And until then, we were constantly hauling and moving things from the old place. I had planned for a possible gap of one week in availability, but when it started to look like I’d be without a studio for a few weeks, I did what my four year old son would do. I built a blanket fort. This “temporary studio” would be my work space until the new studio was ready.
As silly as it sounds, the heavy fleece blankets suspended from lighting trusses worked pretty well to deaden the reflections of a room with otherwise horrible acoustics. But my microphone picked up every little noise from above me. The kids playing, footsteps in the kitchen, central air running, dishwasher, refrigerator, washer/dryer, and much more. Even with a decent processor (compressor/limiter), my recording schedule was an hour or two after 8pm – when the kids were asleep and everything could be turned off. I was down to a quarter of the studio time I needed and I was severely limited in what jobs I could take on, but it saved my bacon.
Finish Line in Sight
Andy continued working solo when he could, and with help when he had it. Just like the recording booth he built a few years prior, we used dual layers of drywall with Green Glue. But this time around, he used isolation clips / furring strips to suspend the interior walls off the studs. Noise transference would be greatly reduced.
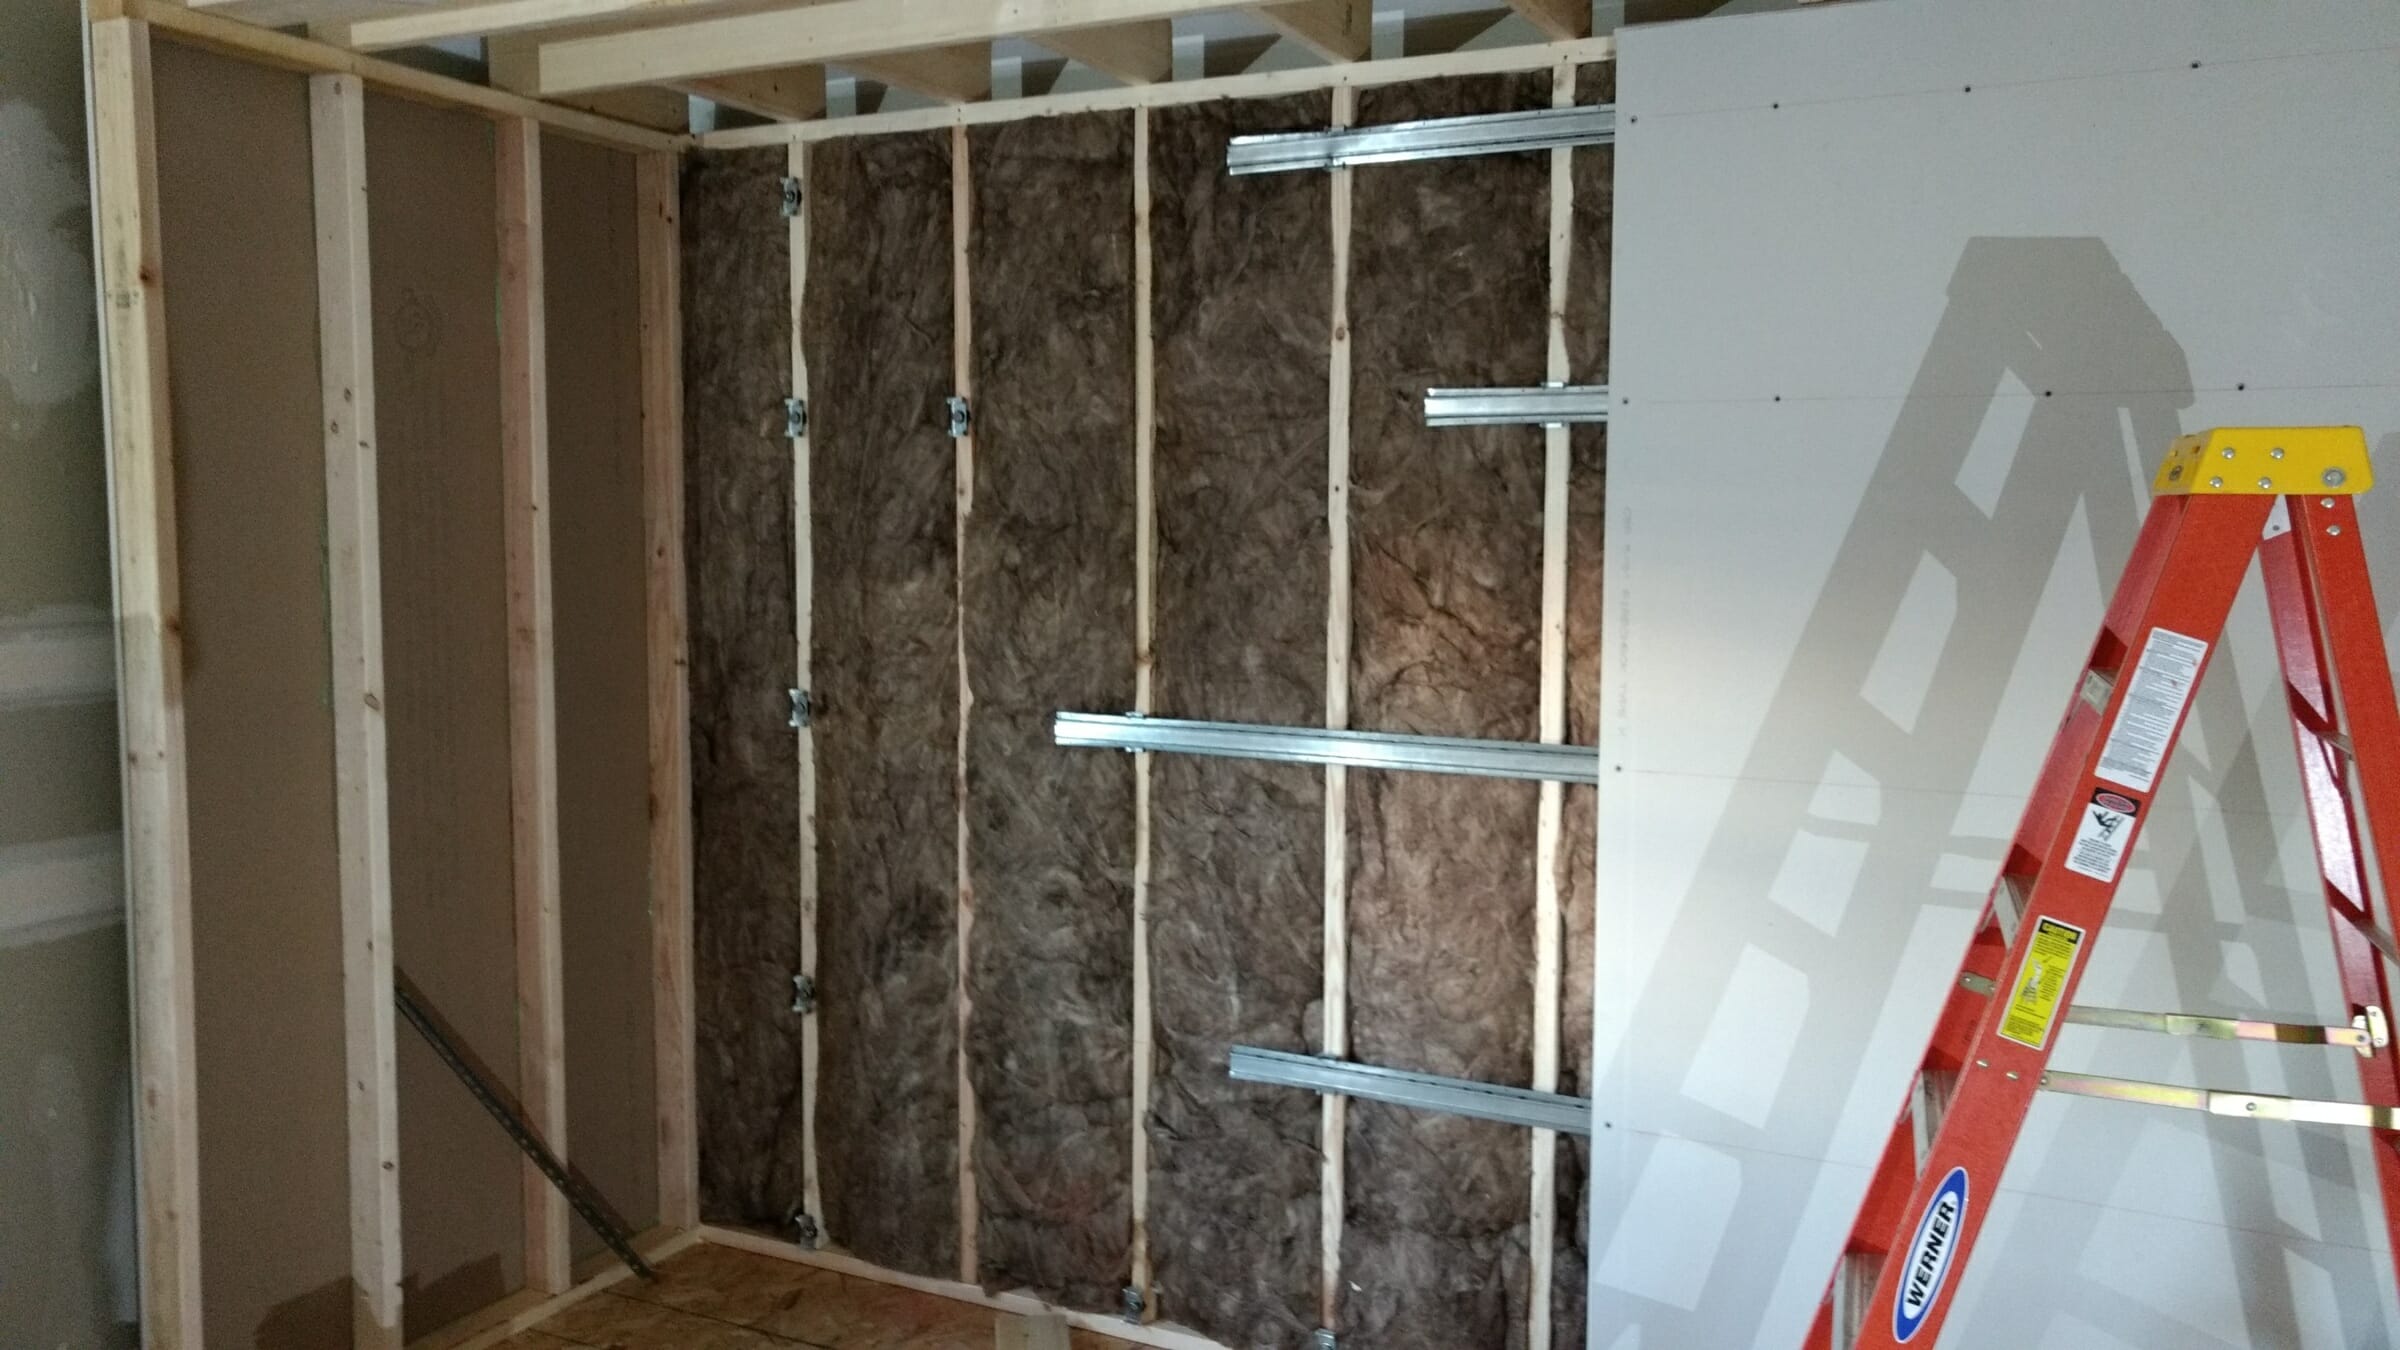
The studio walls use an R19 fiberglass insulation, but the booth walls are the tried and true denim.
To further reduce the number of holes through the drywall, we had the electrician surface-mount conduit, outlets and switches in the studio. He wouldn’t need to seal the outlet boxes with putty that way, and could mount everything after the studio was painted and nearly finished.
The ductless mini-split AC/heater was Andy’s suggestion (and it is fantastic). Some special equipment was required for installation, but if you’re thinking of installing one in your home/studio/office – I highly recommend it.
There were a few hiccups along the way, but everyone involved made great suggestions and helped fix the problems.

Fully functional, with a few finishing touches to go. The studio/office/editing desk.

I installed LED strip lighting around the perimeter of the ceiling because I’m fancy. The mini split is so quiet that I can record when it’s running.
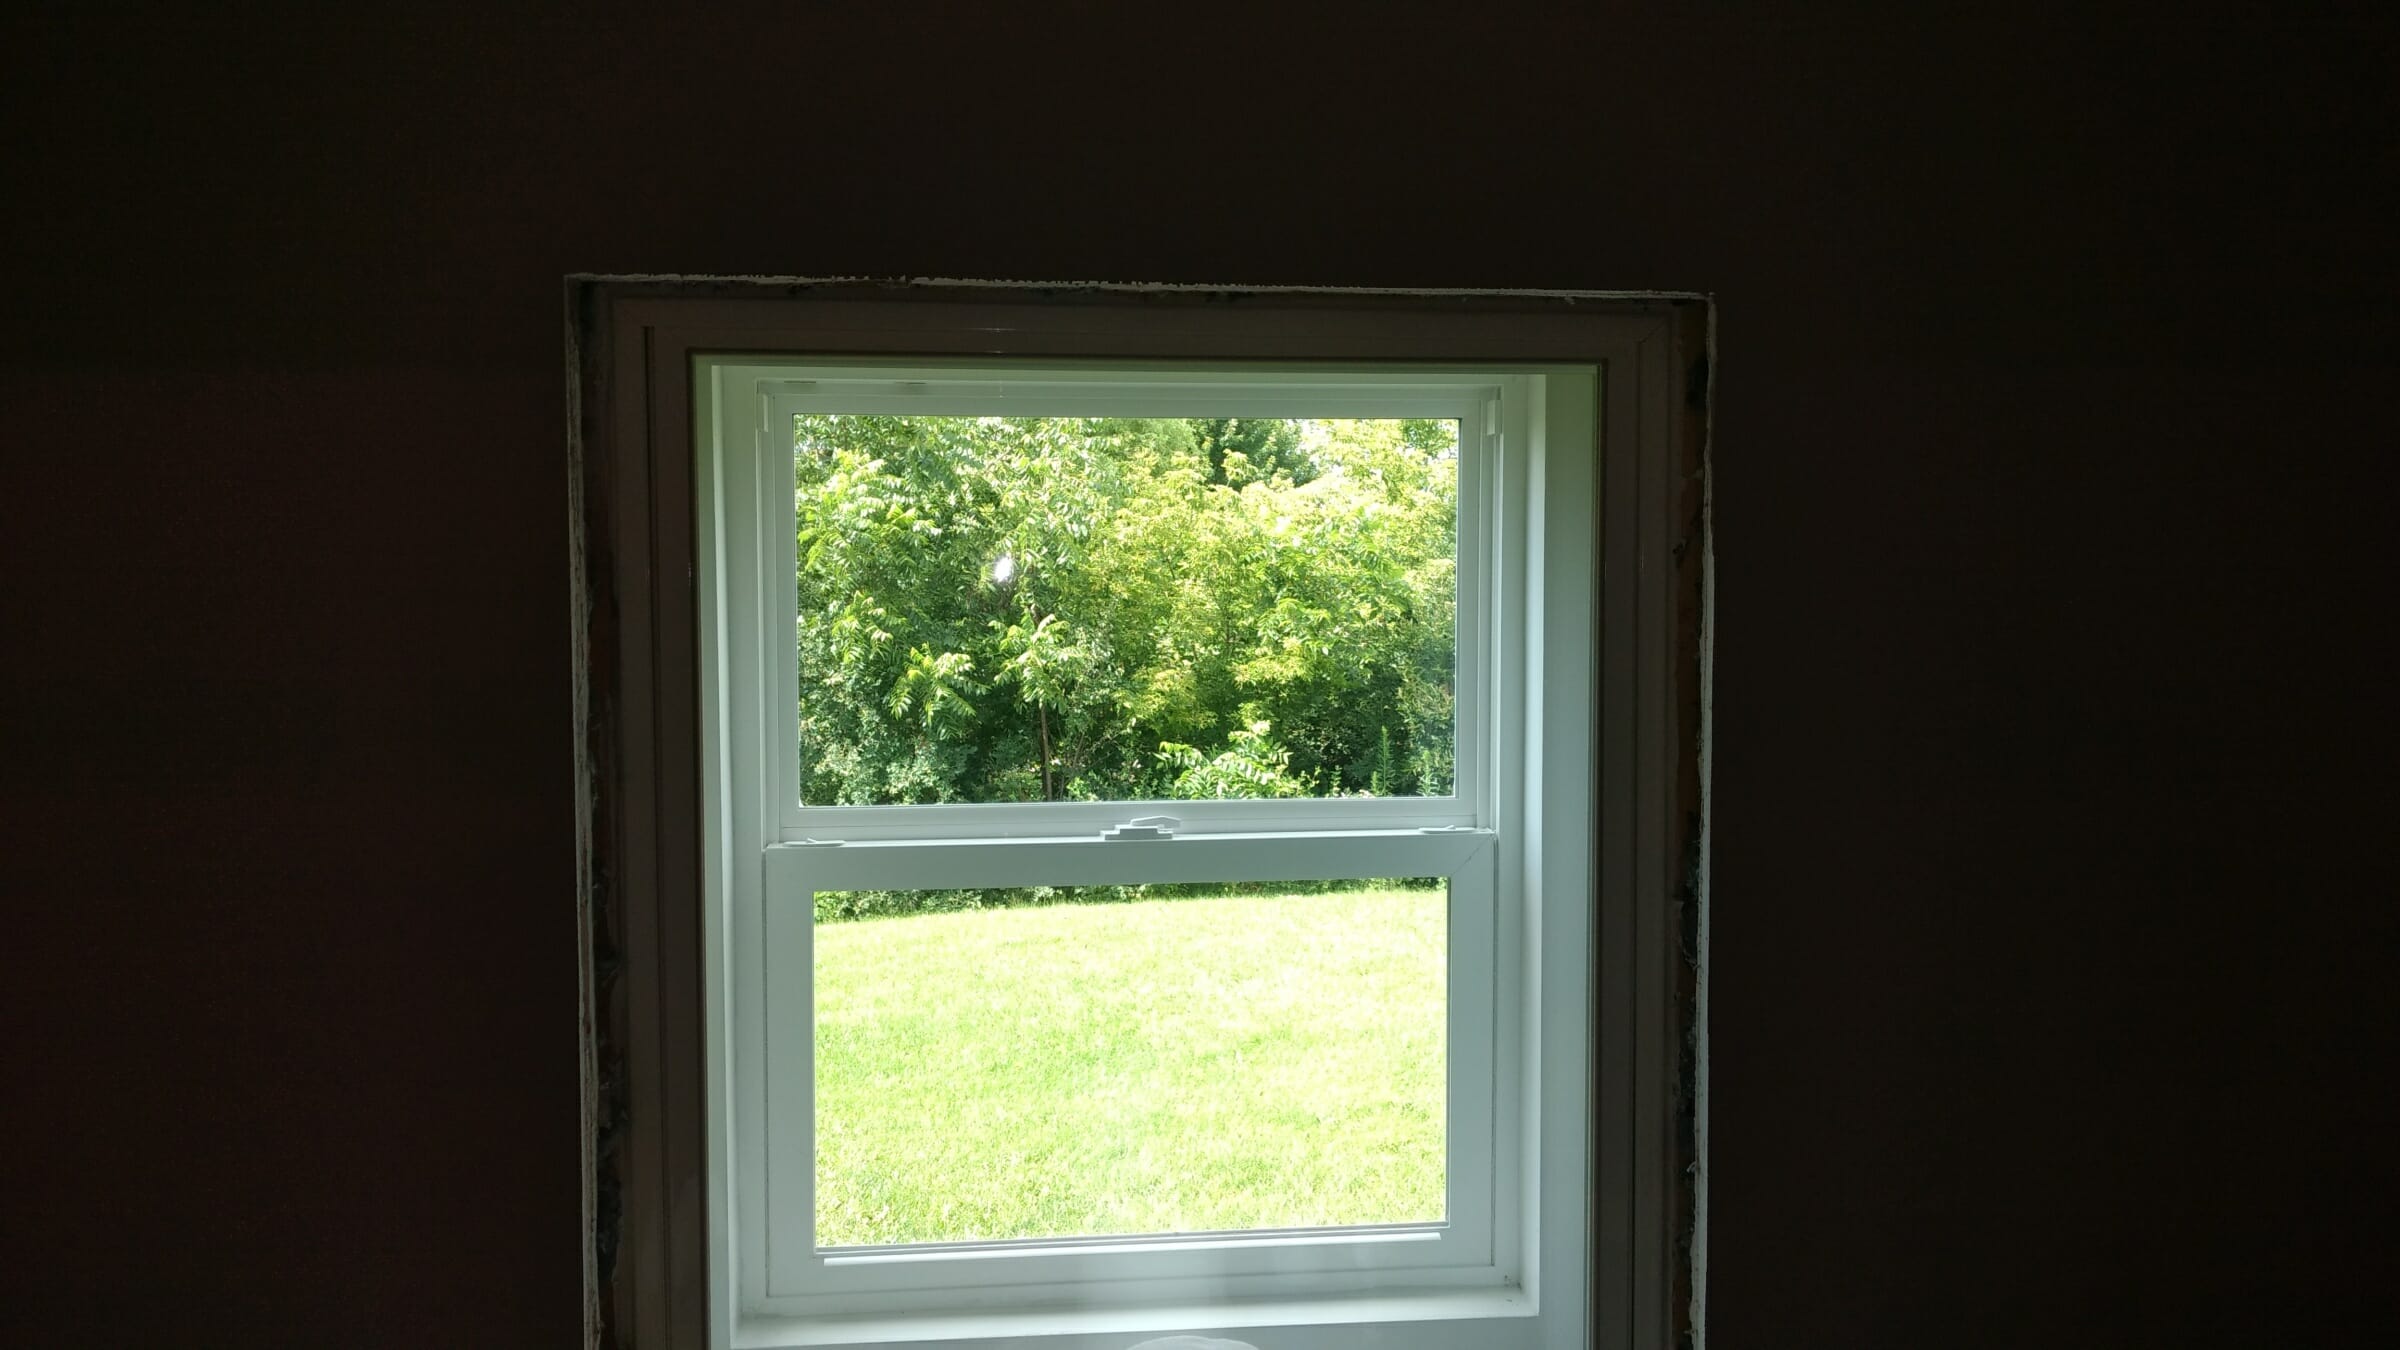
The Soundproof window is exactly that. This pic is prior to trim installation.
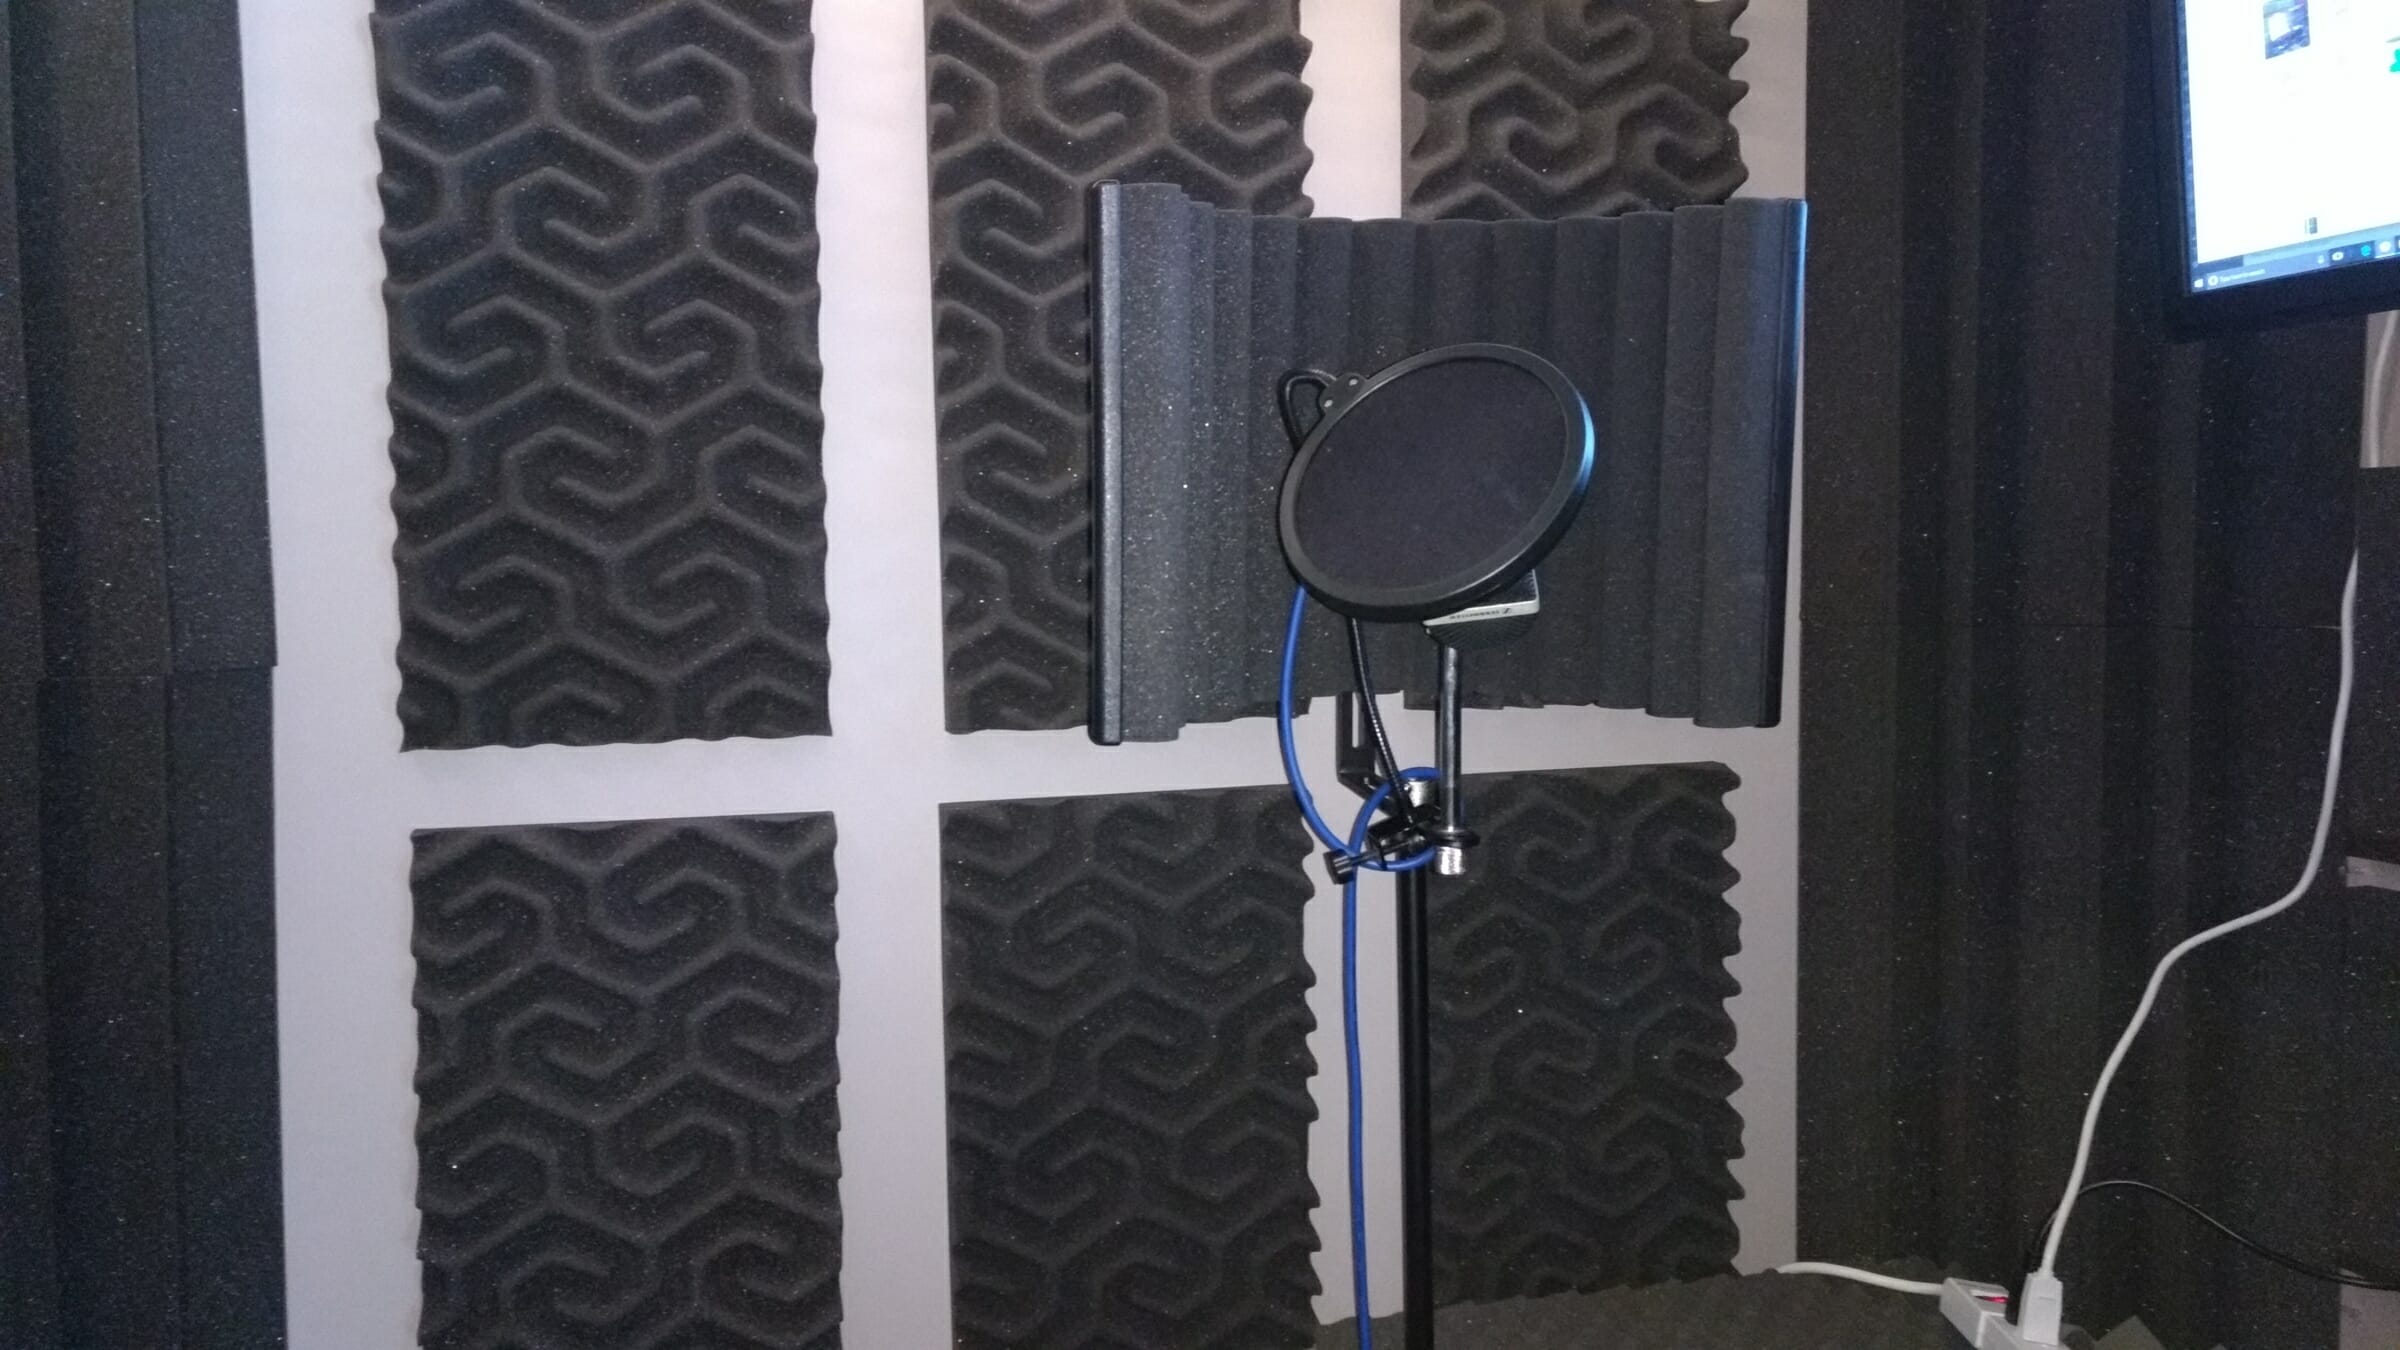
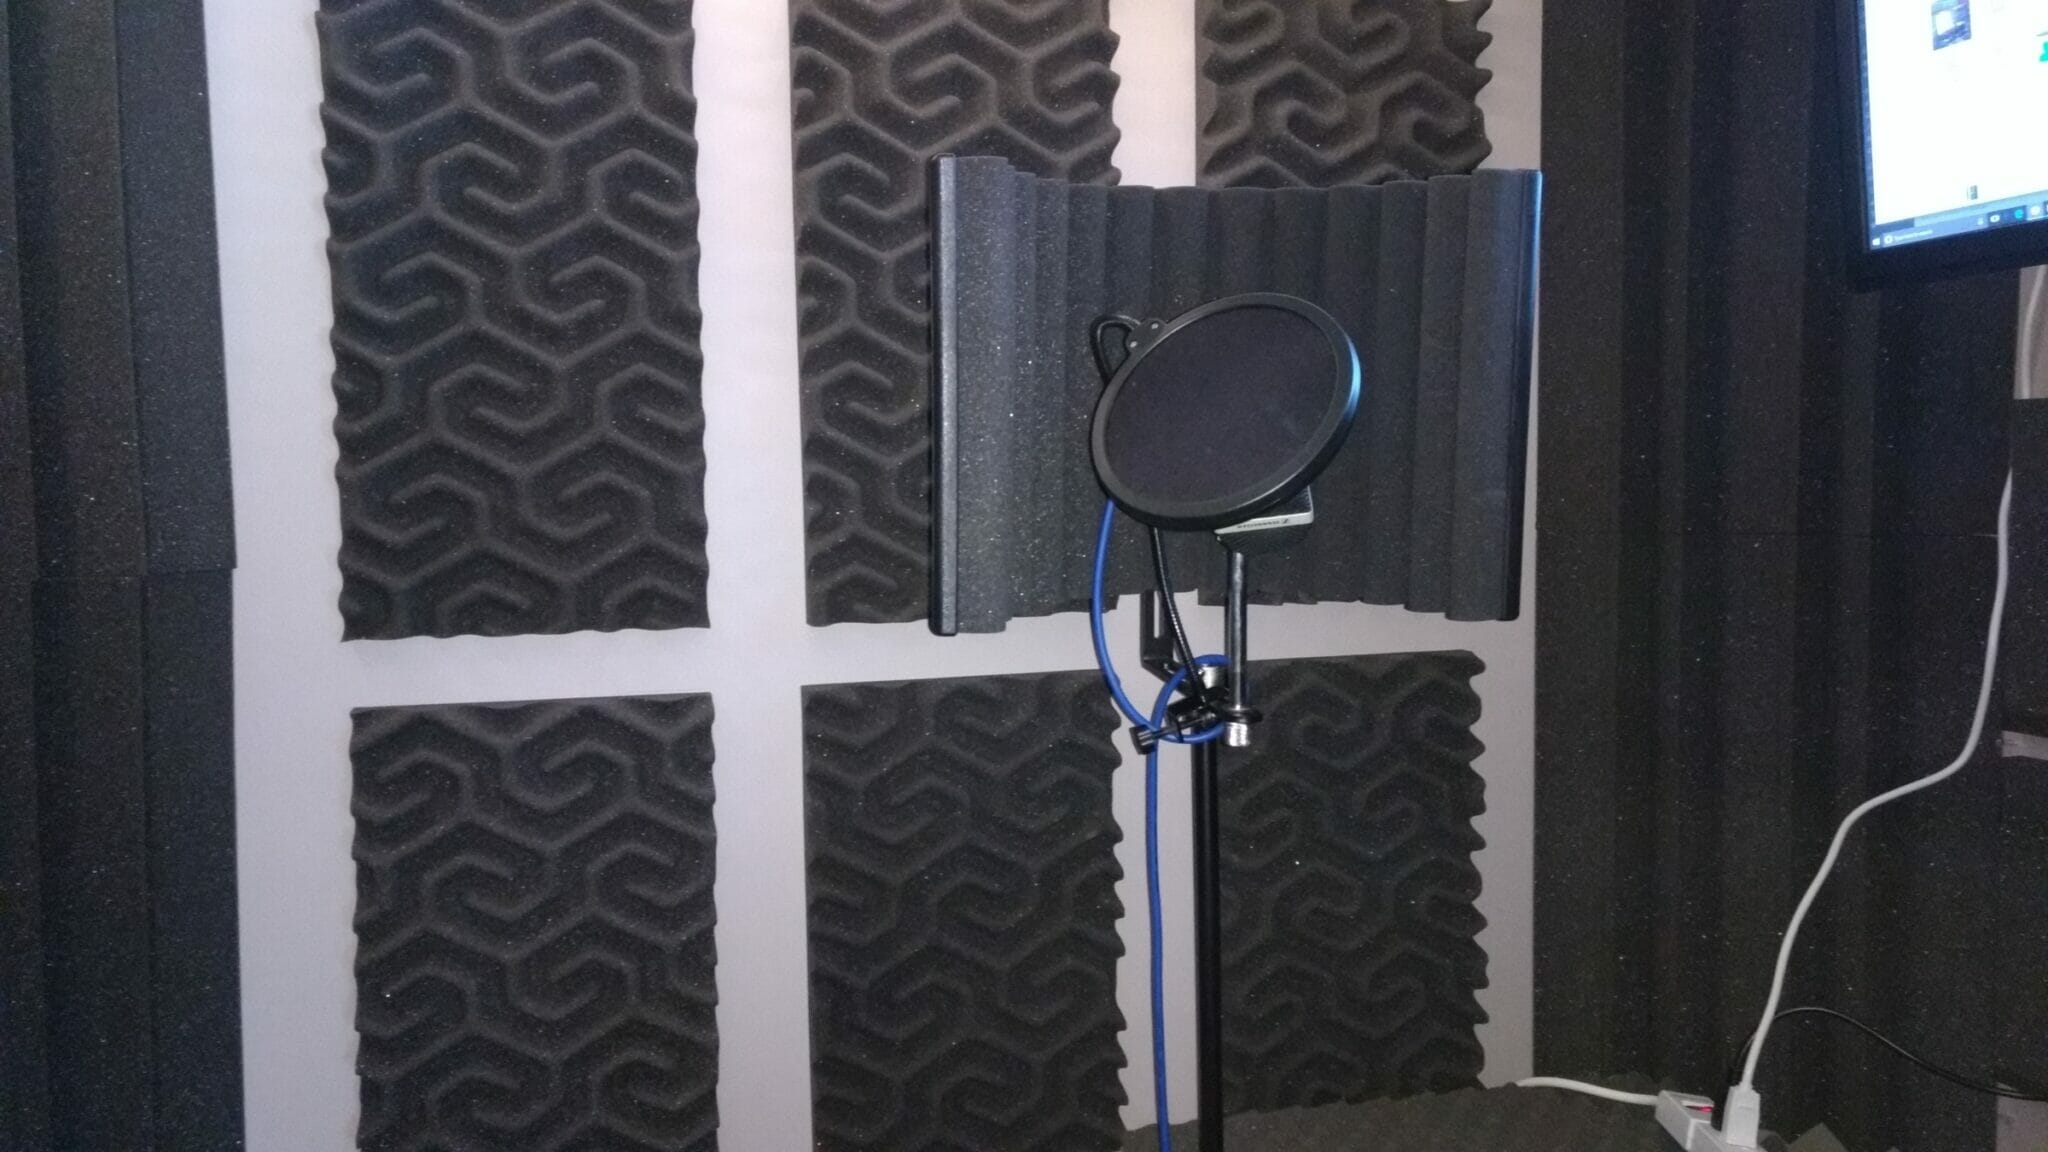
Acoustic foam tiles, bass traps, LED lighting, monitor… The booth.
When we finally skidded across the finish line with our completed building inspection on July 21st, we were only ONE sheet of drywall short. Thanks to my wife Chris, and construction guru Andy, I’m back to work every day, doing what I love to do.
~Jason
Published on Aug 18 2017
Last Updated on Nov 04 2024
Categories: News
Tags: building recording studio, homemade recording studio, studio build, voice over studio, Voice Over studio build